Deploy ASP.NET Core to IIS & How ASP.NET Core Hosting Works

Deploy ASP.NET Core to IIS & How ASP.NET Core Hosting Works

CheapASPNETHostingReview.com | Best and cheap ASP.NET Core 1.0 hosting. In this article, we will review how to deploy an ASP.NET Core application to IIS. Deploying an ASP.NET Core app to IIS isn’t complicated, but ASP.NET Core hosting is a little different than ASP.NET.

How to Configure Your ASP.NET Core App For IIS

The first thing you will notice when creating a new ASP.NET Core project is they are actually console applications. Your project now contains a Program.cs file just like a console app would have and it contains the following code:

What is the WebHostBuilder?

All ASP.NET Core applications require a WebHost object that essentially serves as the application and web server. WebHostBuilder is used to configure and create the WebHost. You will normally see UseKestrel() and UseIISIntegration() in the WebHostBuilder setup code.

What do these do?

  • UseKestrel() – This registers the IServer interface for Kestrel as the server that will be used to host your application. In the future, there could be other options, including WebListener which will be Windows only.
  • UseIISIntegration() – This tells ASP.NET that IIS will be working as a reverse proxy in front of Kestrel. This then specifies some settings around which port Kestrel should listen on, forwarding headers, and other details.

If you are planning to deploy your application to IIS, UseIISIntegration() is required

What is AspNetCoreModule?

You may have noticed that ASP.NET Core projects create a web.config file. This is only used when deploying your application to IIS. It registers the AspNetCoreModule as an HTTP handler.

Default web.config for ASP.NET Core:

If you are planning to deploy your application to IIS, UseIISIntegration() is required

Default web.config for ASP.NET Core:

AspNetCoreModule handles all incoming traffic to IIS and acts as the reverse proxy that knows how to hand the traffic off to your ASP.NET Core application. You can view the source code of it on GitHub. It also ensures that your web application is running. It is responsible for starting your process up.

Install .NET Core Windows Server Hosting Bundle

Before you deploy your application, you need to install the .NET Core hosting bundle for IIS. This will install the .NET Core runtime, libraries, and the ASP.NET Core module for IIS.

After installing it, you may need to do a “net stop was /y” and “net start w3svc” to ensure all the changes are picked up for IIS.

Steps to Deploy ASP.NET Core to IIS

Before you deploy, you need to make sure that WebHostBuilder is configured properly to use Kestrel and IIS. Your web.config should also exist and look similar to our example above.

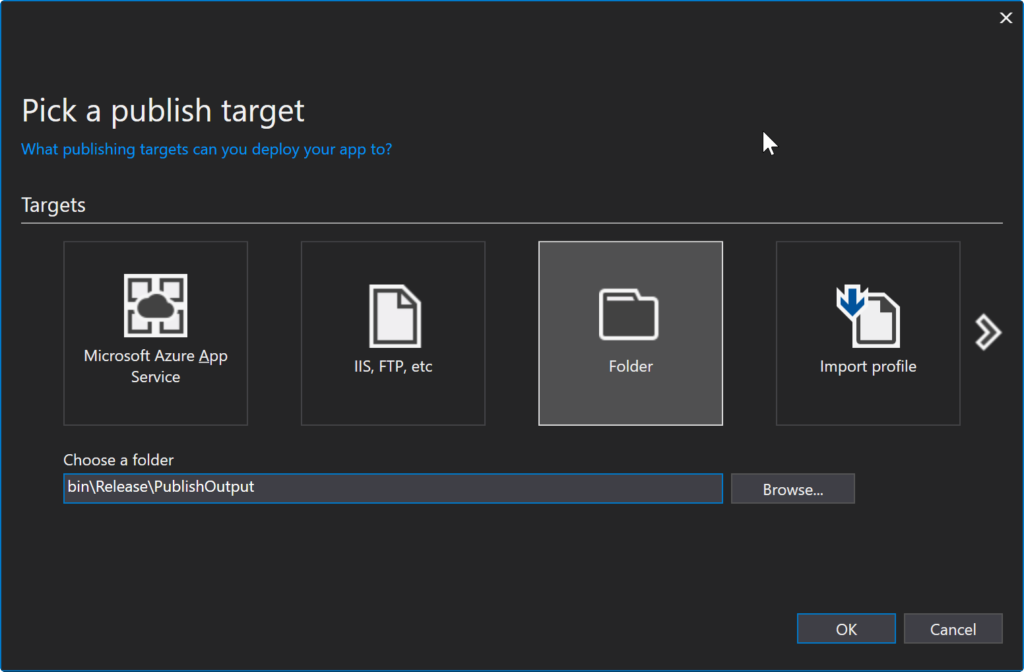
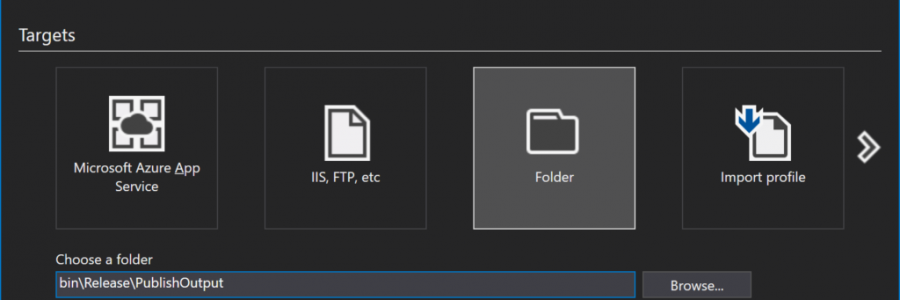
Step 1: Publish to a File Folder

how-to-deploy-asp-net-core-to-iis-10614

Step 2: Copy Files to Preferred IIS Location

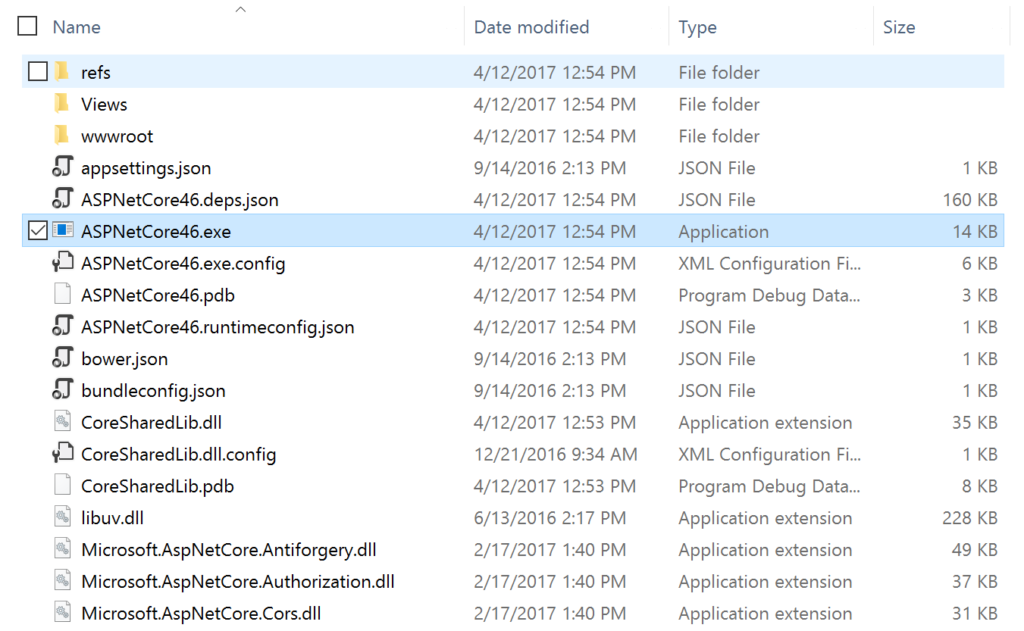
Now you need to copy your publish output to where you want the files to live. If you are deploying to a remote server, you may want to zip up the files and move to the server. If you are deploying to a local dev box, you can copy them locally.

For my example, I am copying the files to C:\inetpub\wwwroot\AspNetCore46

You will notice that with ASP.NET core there is no bin folder and it potentially copies over a ton of different .NET dlls. Your application may also be an EXE file if you are targeting the full .NET Framework. My little sample project had over 100 dlls in the output.

img_58ee6a96d49de-1024x631

Step 3: Create Application in IIS

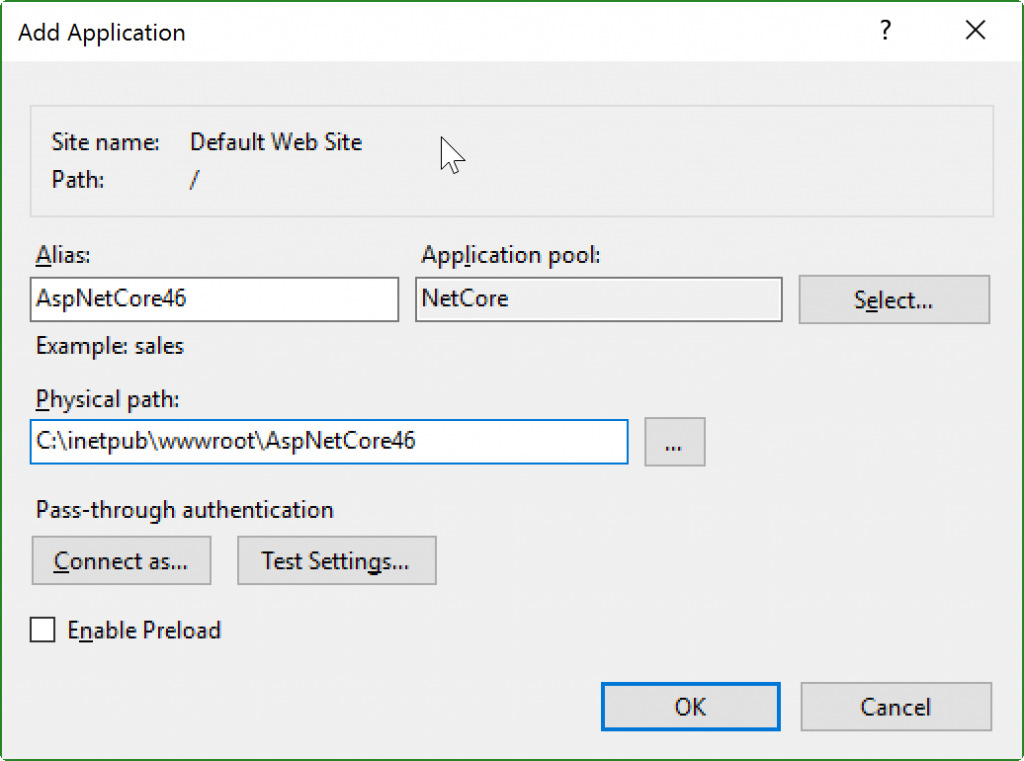
First, create a new IIS Application Pool. You will want to create one under the .NET CLR version of “No Managed Code“. Since IIS only works as a reverse proxy, it isn’t actually executing any .NET code.

Second, create your new application under your existing IIS Site, or create a new IIS site. Either way, you will want to pick your new IIS Application Pool and point it at the folder you copied your ASP.NET publish output files to.

img_58ee6b7a8b7e4

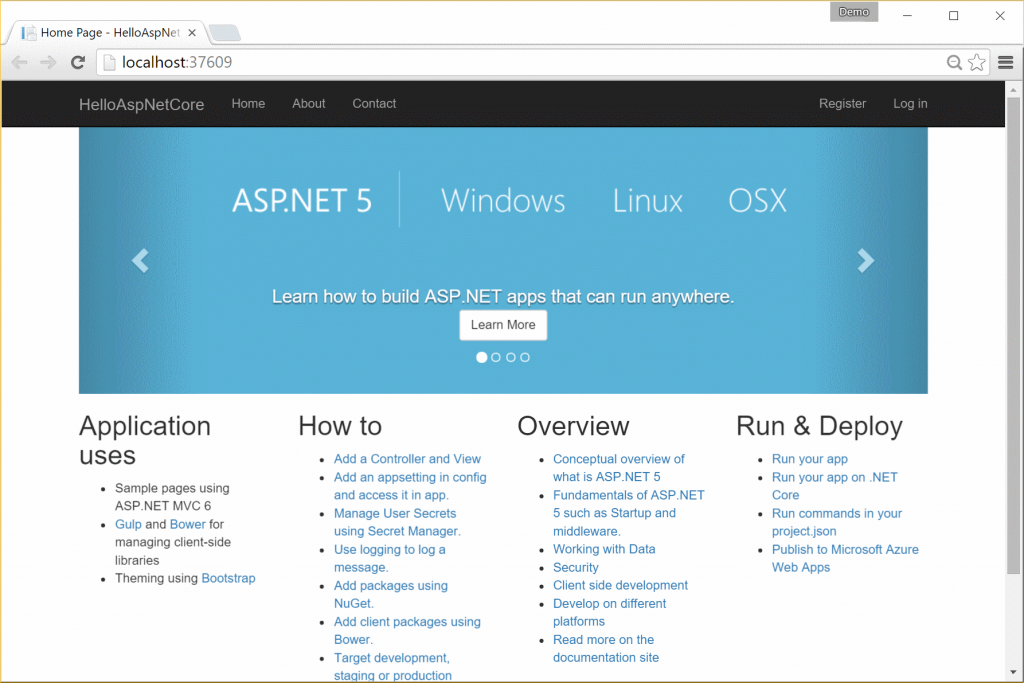
Step 4: Load Your App!

At this point, your application should load just fine. If it does not, check the output logging from it. Within your web.config file you define how IIS starts up your ASP.NET Core process. Enable output logging by setting stdoutLogEnabled=true and you may also want to change the log output location as configured in stdoutLogFile. Check out the example web.config before to see where they are set.

Advantages of Using IIS with ASP.NET Core Hosting

Microsoft recommends using IIS with any public facing site for ASP.NET core hosting. IIS provides additional levels of configurability, management, security, logging, and many other things. Check out my blog post about Kestrel vs IIS to see a whole matrix of feature differences. It goes more in depth about what Kestrel is and why you need both Kestrel & IIS.

One of the big advantages to using IIS is the process management. IIS will automatically start your app and potentially restart it if a crash were to occur. If you were running your ASP.NET Core app as a Windows Service or console app, you would not have that safety net there to start and monitor the process for you.

How To Authentication in ASP.​NET Core for your Web API and Angular2

How To Authentication in ASP.​NET Core for your Web API and Angular2

CheapASPNETHostingReview.com | Best and cheap ASP.NET Core 1.0 hosting. In this post we will talking about Authentication in ASP.NET for web API and Angular. Authentication in a single page application is a bit more special, if you just know the traditional ASP.NET way. To imagine that the app is a completely independent app like a mobile app helps. Token based authentication is the best solution for this kind of apps. In this post I’m going to try to describe a high level overview and to show a simple solution.

There are many ways to protect your application out there. The simplest one is using an Azure Active Directory. You could also setup a separate authentication server, using IdentityServer4, to manage the users, roles and to provide a token based authentication.

And that’s the key word: A Token Based Authentication is the solution for that case.

With the token bases authentication, the client (the web client, the mobile app, and so on) gets a string based encrypted token after a successful log-in. The token also contains some user info and an info about how long the token will be valid. This token needs to be stored on the client side and needs to be submitted to the server every time you request a resource. Usually you use a HTTP header to submit that token. If the token is not longer valid you need to perform a new log-in.

In one of our smaller projects, didn’t set-up a different authentication server and we didn’t use Azure AD, because we needed a fast and cheap solution. Cheap from the customers perspective.

The Angular2 part

On the client side we used angular2-jwt, which is a Angular2 module that handles authentication tokens. It checks the validity, reads meta information out of it and so on. It also provides a wrapper around the Angular2 HTTP service. With this wrapper you are able to automatically pass that token via a HTTP header back to the server on every single request.

The work flow is like this.

  1. If the token is not valid or doesn’t exist on the client, the user gets redirected to the log-in route
  2. The user enters his credentials and presses the log-in button
  3. The date gets posted to the server where a special middle-ware handles that request
    1. The user gets authenticated on the server side
    2. The token, including a validation date and some meta date, gets created
    3. The token gets returned back to the client
  4. the client stores the token in the local storage, cookie or whatever, to use it on every new request.

The angular2-jwt does the most magic on the client for us. We just need to use it, to check the availability and the validity, every time we want to do a request to the server or every time we change the view.

This is a small example about how the HTTP wrapper is used in Angular2:

The ASP.NET part

On the server side we also use a, separate open source project, called SimpleTokenProvider. This is really a pretty simple solution to authenticate the users, using his credentials and to create and provide the token. I would not recommend to use this way in a huge and critical solution, in that case you should choose the IdentiyServer or any other authentication like Azure AD to be more secure. The sources of that project need to be copied into your project and you possibly need to change some lines e. g. to authenticate the users against your database, or whatever you use to store the user data. This project provides a middle-ware, which is listening on a defined path, like /api/tokenauth/. This URL is called with a POST request by the log-in view of the client application.

The authentication for the web API, is just using the token, sent with the current request. This is simply done with the built-in IdentiyMiddleware. That means, if ASP.NET MVC gets a request to a Controller or an Action with an AuthorizeAttribute, it checks the request for incoming Tokens. If the Token is valid, the user is authenticated. If the user is also in the right role, he gets authorized.

We put the users role information as additional claims into the Token, so this information can be extracted out of that token and can be used in the application.

To find the users and to identify the user, we use the given UserManager and SignInManager. These managers are bound to the IdentityDataContext. This classes are already available, when you create a new project with Identiy in Visual Studio.

This way we can authenticate a user on the server side:

And this claims will be used to create the Jwt-Token in the TokenAuthentication middle-ware:

This code will not work, if you copy and past it in your application, but shows you what needs to be done to create a token and how the token is created and sent to the client.

Structured Logging in ASP.NET Core

Structured Logging in ASP.NET Core

CheapASPNETHostingReview.com | Best and cheap ASP.NET Core 1.0 hosting. ASP.NET Core is a complete rewrite of ASP.NET, targeting .NET Core on Linux and OS X as well as Windows.

Among the many upgrades in the new version is a completely rewritten diagnostic logging pipeline that not only emits interesting events from the framework, but uses structured logging to do so.

Structured Logging in ASP.NET Core

Like Serilog, ASP.NET Core uses message templates (named placeholders in format strings) to capture structured properties along with textual log data:

If this event is written out to the console, it will be formatted as plain text:

This is ideal during development, when a readable text format is preferred.

But, when the logging provider supports structured data, the properties associated with the event can be preserved in a machine-readable form:

Armed with structured log data, it’s easy to slice and dice logs with queries like:

This is a game-changing capability for complex distributed apps, or when log data runs more than a few hundred events in a day.

Setting Up

These instructions assume that you’ve created a new ASP.NET web application using the template in Visual Studio (File > New… > Project > ASP.NET Web Application).

Out of the box it should look something like this:

Capture

The packages we’ll install are:

  • Serilog – a logging framework for structured data
  • Serilog.Extensions.Logging – an ASP.NET logging provider that implements ASP.NET’s ILogger on top of Serilog
  • Serilog.Sinks.Seq – a Serilog sink that ships events to Seq over HTTP

To really take advantage of ASP.NET Core’s logging today, you’ll need a complete logging provider like Serilog to handle the task of shipping log events to most back-end storage targets, as only a few basic providers such as a console logger are there today. Over time it’s likely ASP.NET Core will gain more capabilities of its own in this area.

Crucially, all of the packages supporting ASP.NET Core are currently pre-release, so make sure to include the -Pre switch when installing from the Package Manager Console:

Then, the following lines added to Startup.cs will configure the Serilog back-end:

This assumes you have Seq running locally on your development machine, listening on the default port. Replace http://localhost:5341 with the address of you Seq server if it lives somewhere else.

(Adding Enrich.FromLogContext() here ensures that any events written directly through Serilog will seamlessly pick up correlation ids like RequestId from ASP.NET.)

Finally, also in Startup.cs, add Serilog to the ILoggerFactory that’s passed into the Configure() method:

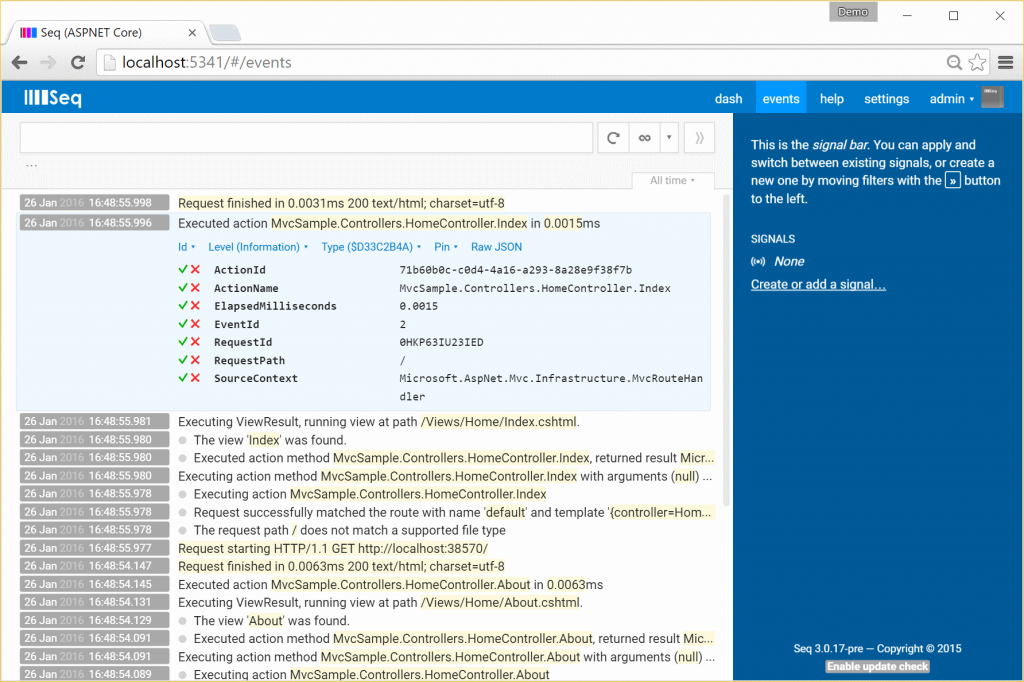
When you refresh the application, all kinds of interesting data from the framework’s inner workings will appear in Seq:

Capture2

In this screenshot you can see a few familiar MVC processes going on – requests started and finished, actions invoked and views selected.

Writing custom events

It would be interesting, but fairly underwhelming, if the story ended here. The real value in the new logging pipeline is that your own application events get the same treatment.

The simplest way to start logging from your own controllers is to take a dependency on type ILogger<T>:

The T generic parameter is passed so that log events can be tagged with the class that raised them.

ILogger<T> has methods like LogInformation(), LogWarning() and LogError() to write events to the logging pipeline:

Look carefully at the properties attached to the resulting event:

Capture3

The first thing to notice is that the MachineName argument we supplied in the format string is there as a first-class property that can be used when searching for events.

The second thing to observe is RequestId – this little gem is added automatically by the ASP.NET framework to all events raised during a web request. Filtering down to a single RequestId will find all events related to just that HTTP request – your own, and the ones raised by the framework. If you don’t use this technique already, it’s something you absolutely must try.

Alternatives for ASP.NET 4.6

Not using ASP.NET Core just yet? Check out the Serilog support for ASP.NET 4.6, which adds a lot of structured logging goodness through a NuGet package.

Happy logging!